

Everyone knows the tried and true woolly bugger just does work. That fly gets it done time and time again. Its simplicity paired with its effectiveness are what makes this fly great. Another fly that I've come across that could go toe to toe with the ol' bugger is John Barr's slumpbuster. True to the name, this fly can bring in fish even on a tough day. Up until recently, the methods I saw to tie this fly didn't exactly sit well with me. They were either too lengthy or the fly just didn't quite look right to me when it was finished. In this little walk-through I'll illustrate a few tricks I've used to simplify and quicken this tie.
Materials
Hook: Tiemco 5263 Size 6
Thread: Danville 6/0 Olive
Head: Size medium brass cone head
Body: Pearl ice dub
Rib: Olive wire size brassie
Wing: Olive rabbit strip
Collar: Olive rabbit strip cut off of the hide and spun in a dubbing loop
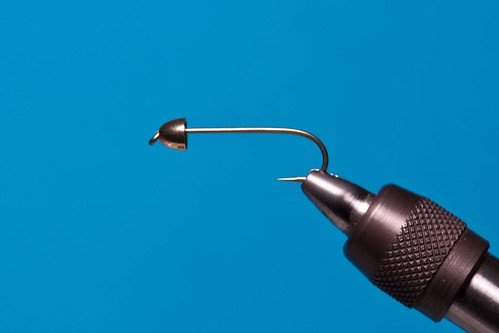
1. Slide cone head on the hook and insert into vise.
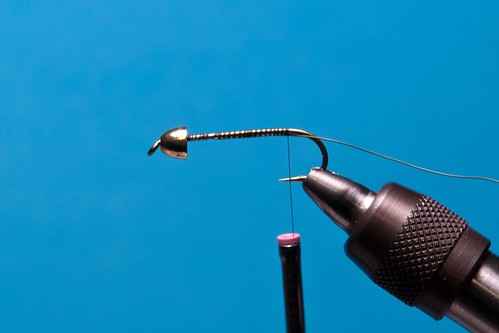
2. Start thread and tie in about 6 inches of wire underneath the hook. Advance the thread back to the hook bend continuing to lock in the wire.
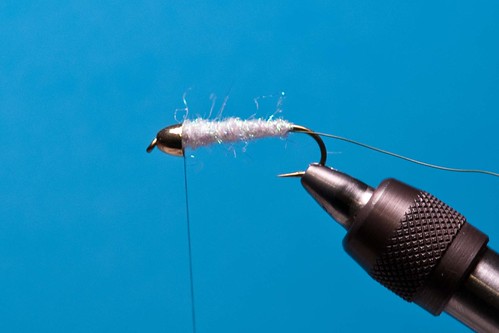
3. Dub forward a slightly tapered body. The body should get thicker as you get closer to the cone head.
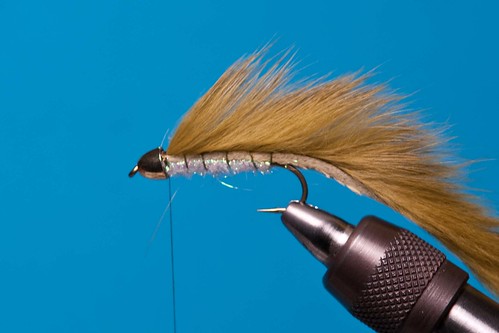
4. Tie in a rabbit strip behind the cone head securing the front just with thread.
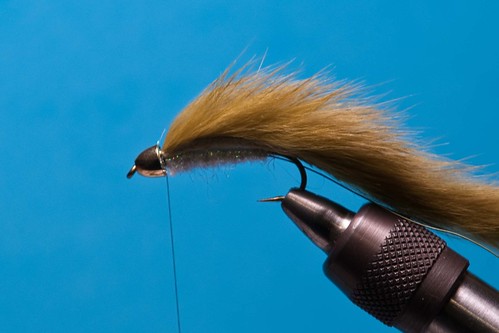
5. Then carefully split the hairs of the rabbit strip in the rear by the hook bend and begin weaving the wire through. Tie off the wire and clip off the excess. This firmly locks the rabbit strip in place. In John Barr's original tutorial he ties in the rabbit strip with thread at the rear first, before creating the body. This can become cumbersome and get in the way during the rest of the tie. However, I picked up this trick of securing the rabbit later in the tie from Charlie Craven's website and I find it is a much more efficient method.
6. This next step is one I've applied to my slumpbusters. Most just wrap the collar with same piece of rabbit strip or tie in a piece of cross-cut rabbit and use that. However, with the hide still attached to the hair I've found this creates too much bulk towards the head. Then it dawned on me to apply a technique I use in many steelhead flies and just cut the hide off and spin the hair in a dubbing loop. In order to do this, first create a dubbing loop and then place the rabbit strip in the loop.
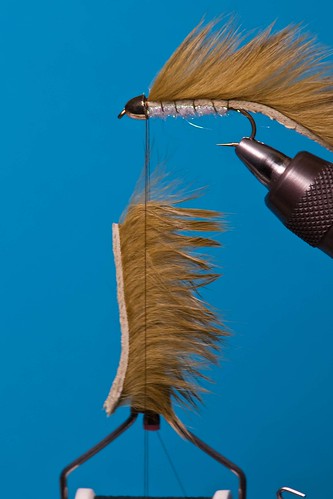
7. Next, cut the hide off of the hairs and then spin the hairs. This step and can be somewhat tricky at first but will get easier with practice. If the hairs get kind of clumped up use a brush to straighten them out.

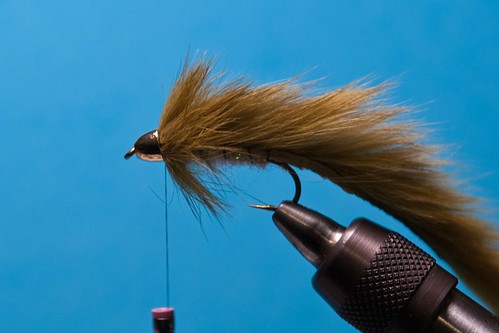
8. Then palmer the hairs to form the collar. After each wrap stroke and hold the hairs back so they don't pinch the previous wraps.
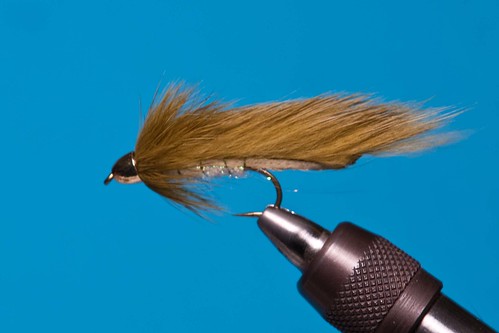
9. Tie off the dubbing loop and whip finish. Then trim the tail to about a shank length long.
Just like the woolly bugger, this fly can have many variations with color or materials. To weight the fly a tungsten head can be used and/or with lead wire in the underbody. Legs or flash could be added as well. This is just the base pattern, but one can customize it till their heart's content. As a side note, I like to use rabbit instead of pine squirrel for most sizes. Although this pattern traditionally calls for pine squirrel strips, I prefer the the thickness and length of the rabbit hair better. I think it moves better in the water. For sizes smaller than 8, pine squirrel would be a better option to keep everything proportional.
With this method, I can whip out a batch of these relatively quickly. They are work horse flies and don't take much time to tie, which is a definite plus. This fly fishes great when stripped in or swung down and across. The rabbit hair just moves a ton in the water. Tie a few up and test them yourself! You won't be sorry!
Stay fly,
T
No comments:
Post a Comment