

So this little project started off because simply because I can be forgetful at times. I really didn't need a new anchor, nor was I thinking of upgrading, but after a float one day on a local river I just totally forgot to pick mine up after I took it off at the take out.....
Well obviously then I needed a new one, so I started looking at prices online and saw that a replacement would run me $80+! I figured it couldn't be all that hard to make one, so I set out to do just that. Let me preface that to build an anchor requires some know-how or at least have friends with the capabilities. I saw some anchors that had steel housings filled with lead and this sounded like a good route to go for multiple reasons. Simply put, it would last longer since straight lead anchors have a tendency to chip away in the rocky river bottom. Plus, all those lead chips pollute the river, so having a steel case would eliminate that from happening.
Being that I am not a welder, and don't happen to be very good at it, I talked to Daniel and he said he could make that part happen. As an added bonus, he had some scrap steel from a job site that would fit the bill for the casing. For the lead fill, that can be the expensive part if you don't have access to scrap. Luckily, my dad is a member of a gun range that allows foraging for scrap bullets and casings. It just so happens too that he recasts lead bullets and reloads his own rounds, so we have plenty of scrap lead lying around. The last part I needed was a ring eye bolt. After a quick trip to the local hardware store and $6 later, that part was taken care of. Now that I had figured out the logistics and acquired the materials, the build came together.
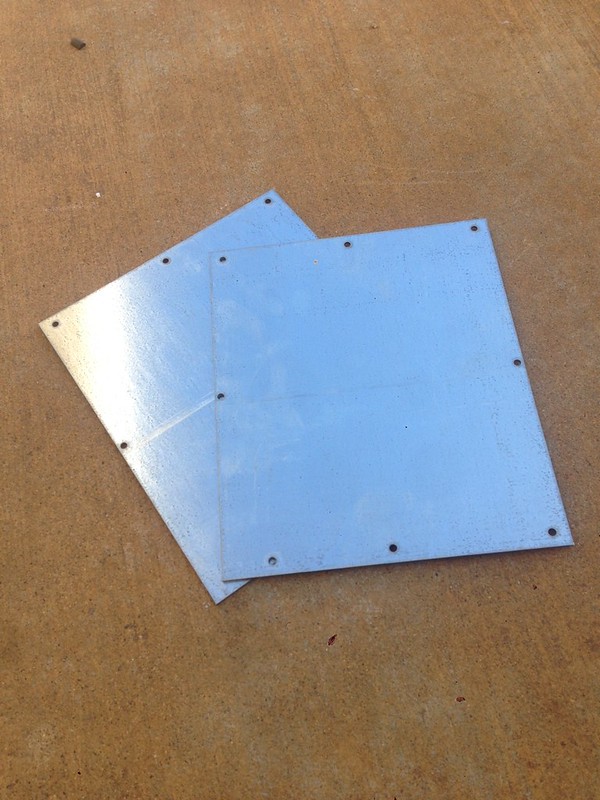
1. Scrap steel ready to be cut.
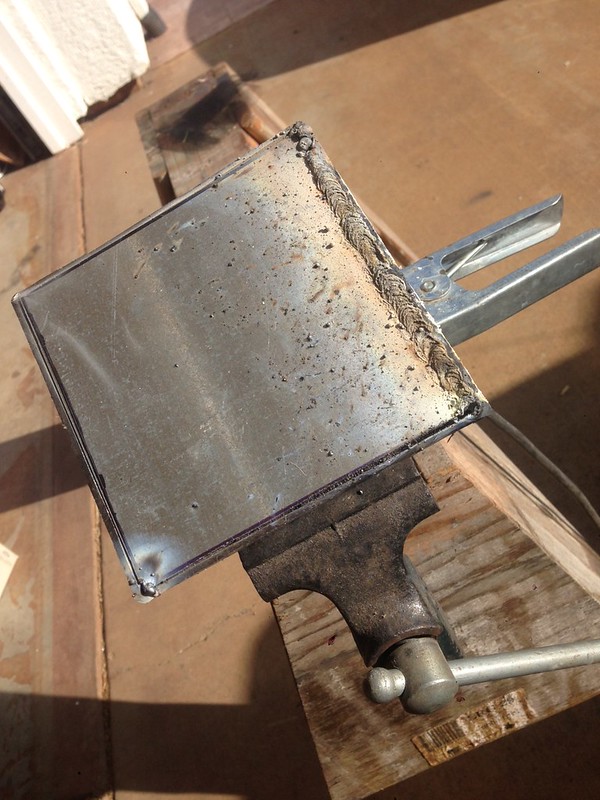
2. Cut steel and tack weld in place. (The measurements for this anchor were 5.5" x 5.5" for the top square, 3" x 3" for the bottom square, and 4" tall. This configuration yielded a 28lb anchor.)

3. Weld up all of the sides.
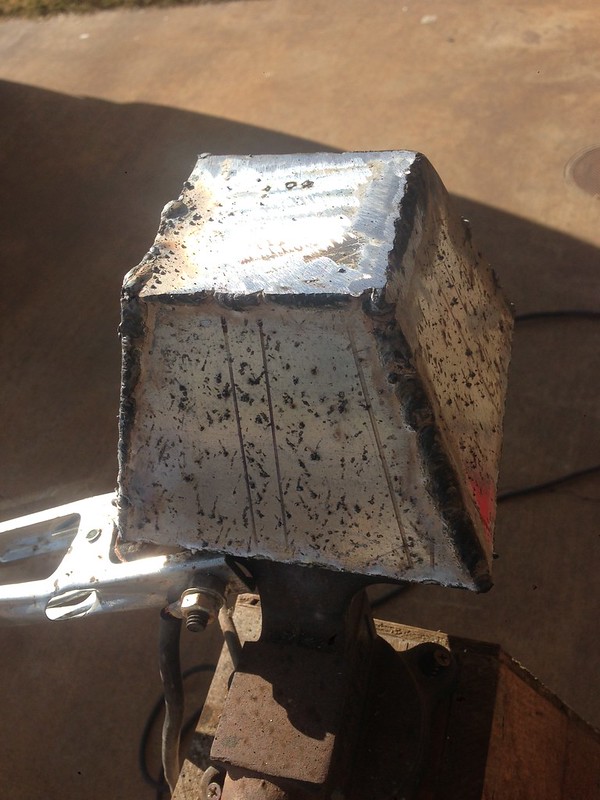
4. Use a grinder to smooth out the rough edges and welds.

5. Drill a fill hole and start smelting the scrap lead.
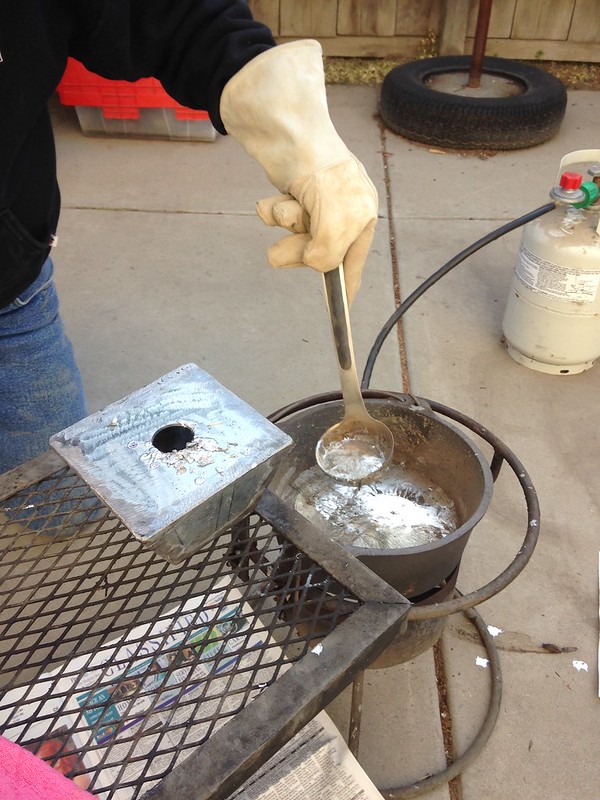
6. Fill anchor with hot lead. (Make sure to be very safe and use protective equipment.)

7. Place the ring eye bolt in the lead while it is still hot.
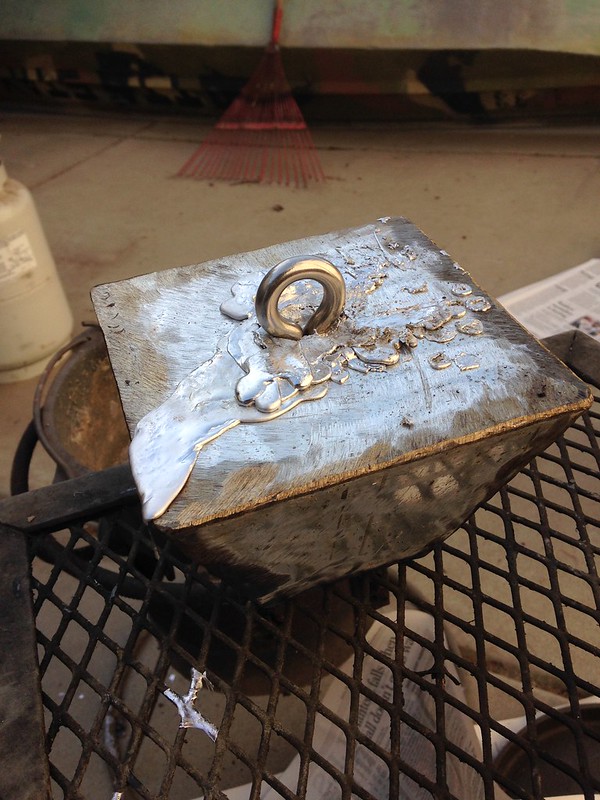
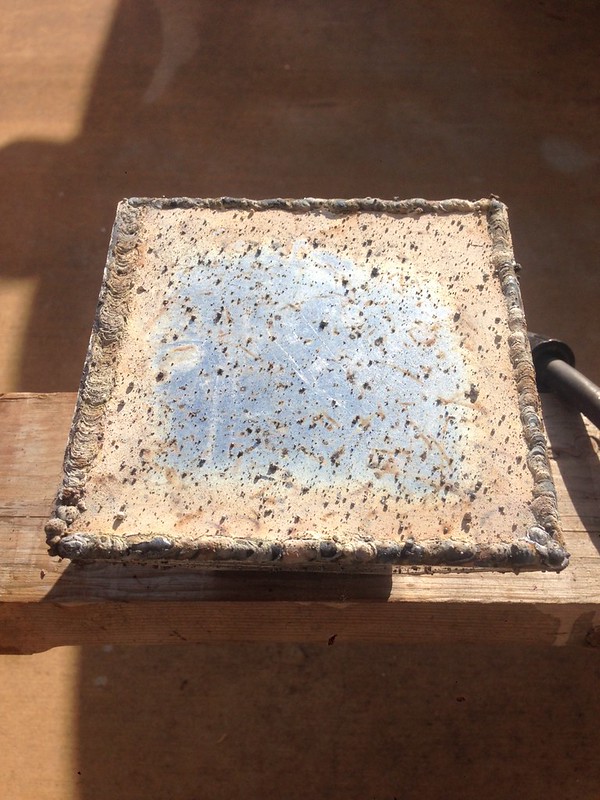
8. Remove the excess lead and let it all cool and harden into place.
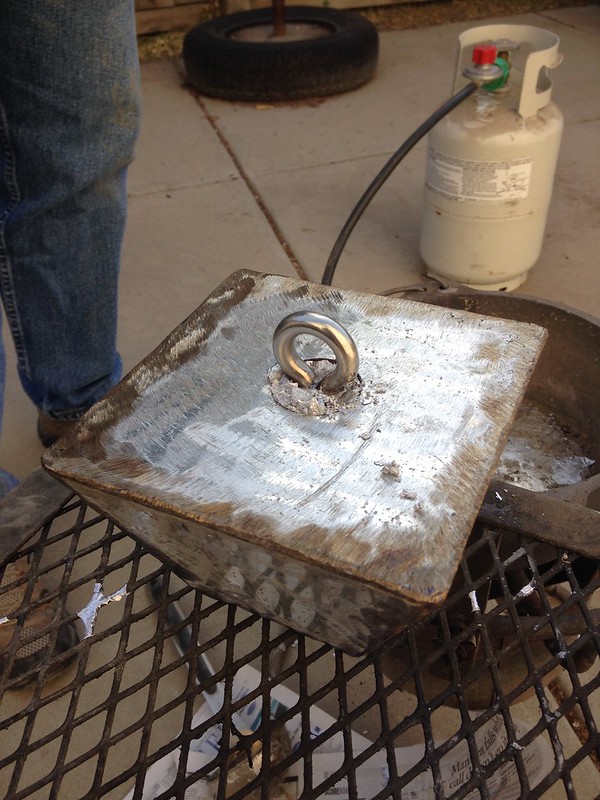
9. Ready to hit the water!
All in all, this build wasn't terribly difficult if you have access to all the right tools and materials. Basically most of this anchor was made from all recycled materials that were essentially trash before they were repurposed. As far as cost goes, I only ended up having to buy a ring eye bolt and that was it. So far, this new anchor has been on around a half dozen or so floats and has performed and held up perfectly. If you're in need of a new anchor or want to upgrade, think about building one before you buy!
Stay fly,
T

