Thursday, March 21, 2013

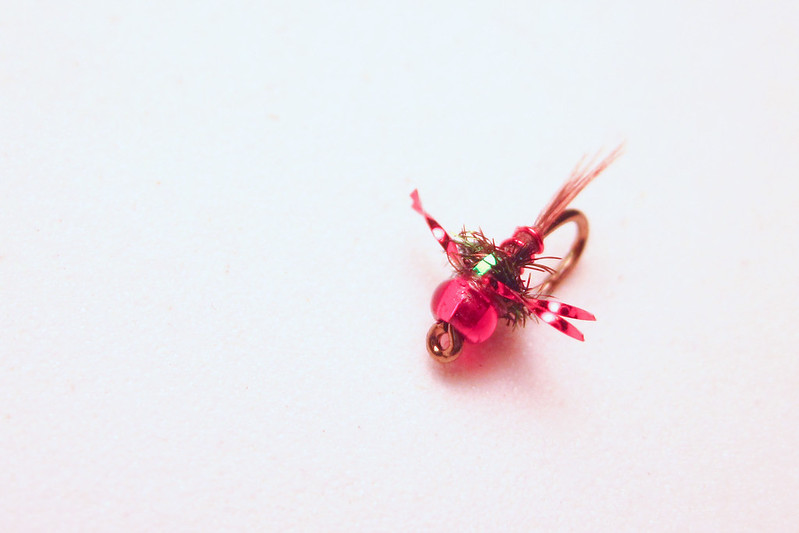
Hogan's Red Headed Step Child

Red Headed Step Child
It's been awhile since I've done just a photo tying segment, so I thought I'd share another one.  Hogan Brown's Red Headed Step Child is a pattern I recently started tying and let's just say the first drift I made with it got a fish.  Not designed to really resemble anything, this fly is a great attractor pattern and works simply on the premise that it is different.  It's a good pattern to tie on when the ol' PT isn't getting the job done.  I prefer the smaller ones (#16's/#18's) and think if you add only a few to your box those sizes are the ticket.  Anyway, here it goes!

Materials:
Hook:  TMC 3769 (Size of choice, the one in the example is an #18)
Thread:  8/0 Brown
Head:  Czech Glass Bead (11/0  Red Seed bead Silver Lined)  (These can be found at craft stores for super cheap and in high quantities)
Tail:  4/5 PT fibers
Rib:  Red Wire, Small
Thorax:  Peacock Herl
Wing Case:  Pearlescent Flat Tinsel
Legs:  Red Krystal Flash
Finish:  Clear Cure Goo Hydro

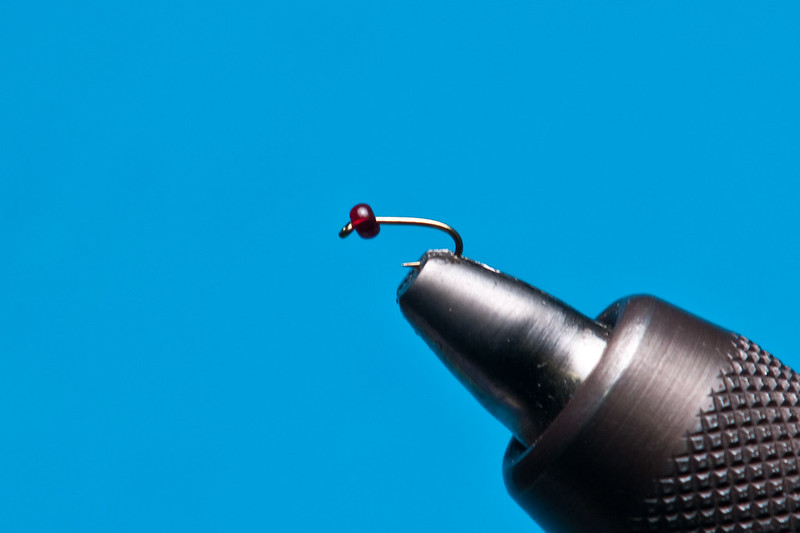
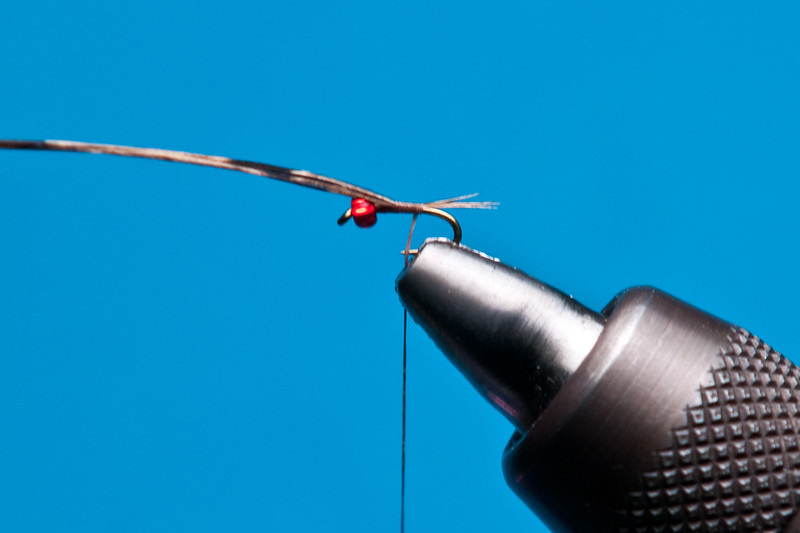
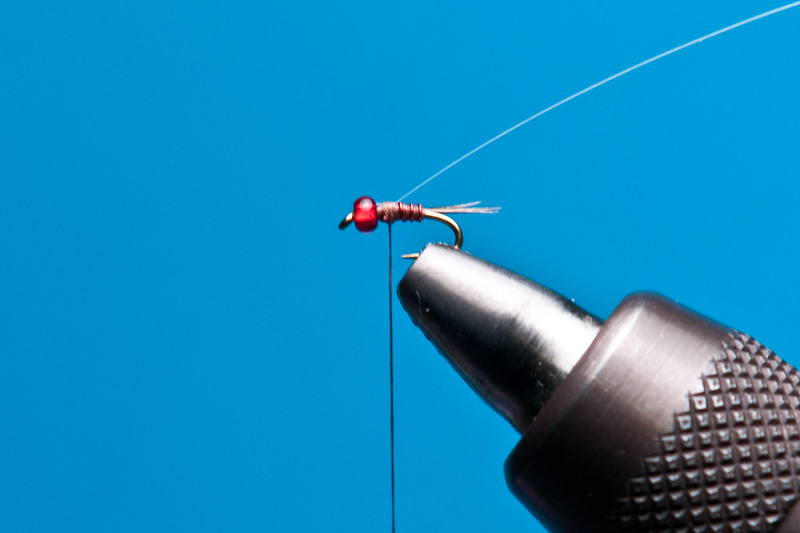
1.  Insert hook w/ bead into the vise and tie in the PT fibers.  The fibers should extend about 1/2 shank length.
Red Headed Step Child 1
Red Headed Step Child 2

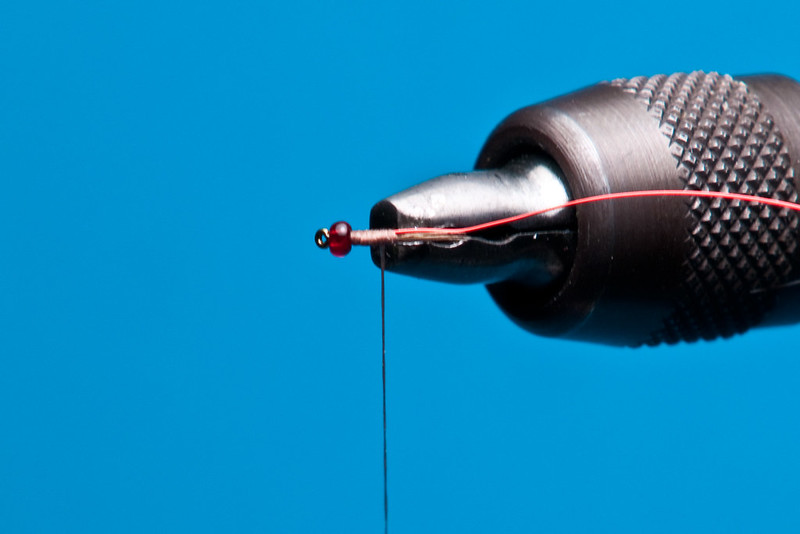
2.  Tie in the wire rib on the far side of the hook.
Red Headed Step Child 3
Red Headed Step Child 4

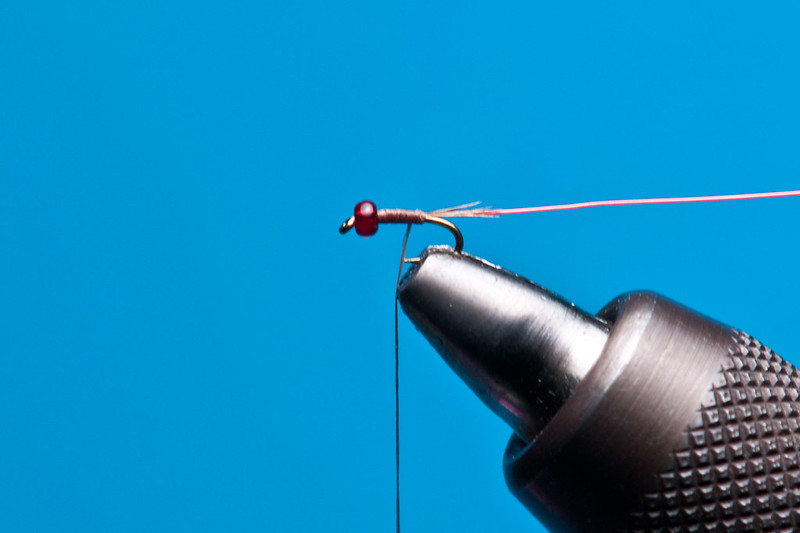
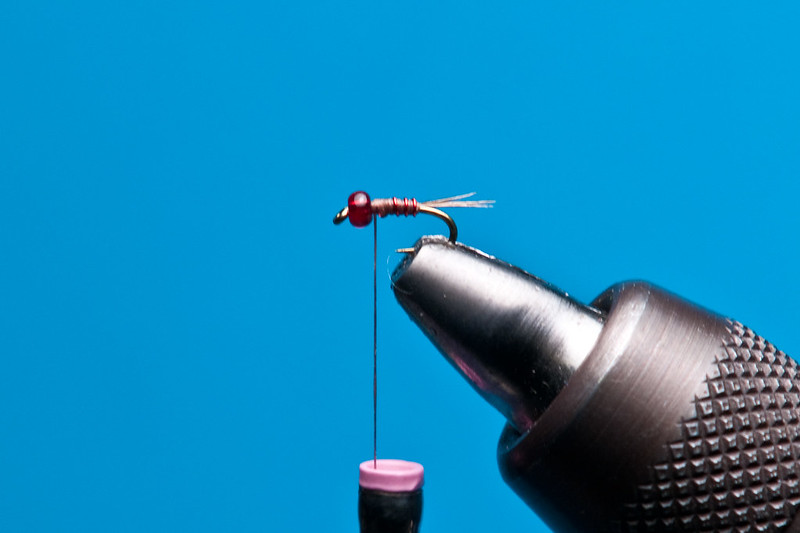
3.  Advance the wire rib forward.  On a #18, 3 wraps is sufficient to maintain the right proportion.
Red Headed Step Child 5

4.  Tie in the pearl tinsel directly on top of the shank.
Red Headed Step Child 6

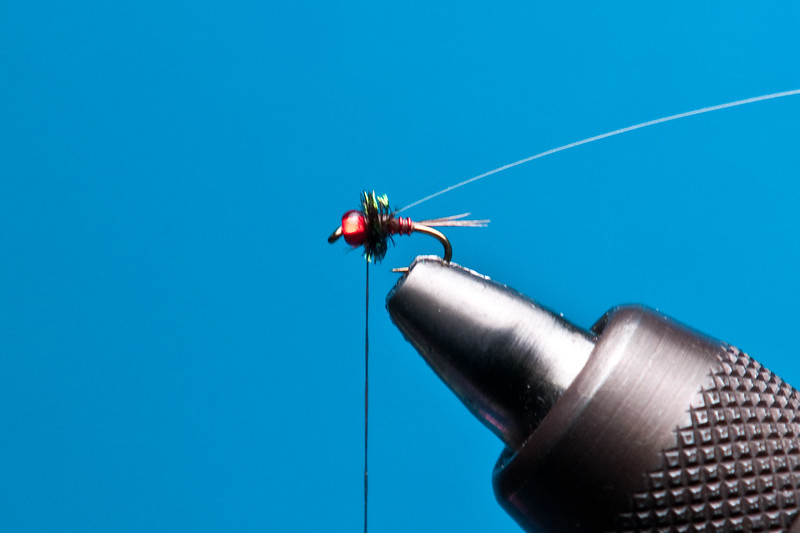
5.  Tie in the peacock herl and wrap forward to create the thorax.  (One bushy herl is enough for a #18)
Red Headed Step Child 7

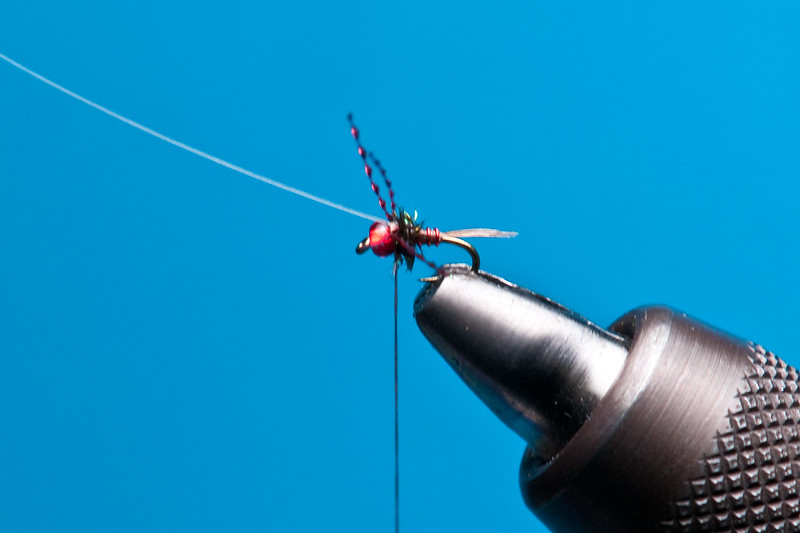
6.  Using the figure 8 method, tie in two strands of krystal flash.  (With a smaller fly, try and minimize thread wraps from here on out in order to not crowd the head)
Red Headed Step Child 8

7.  Pull over the pearl tinsel, tie it off, and whip finish.
Red Headed Step Child 9

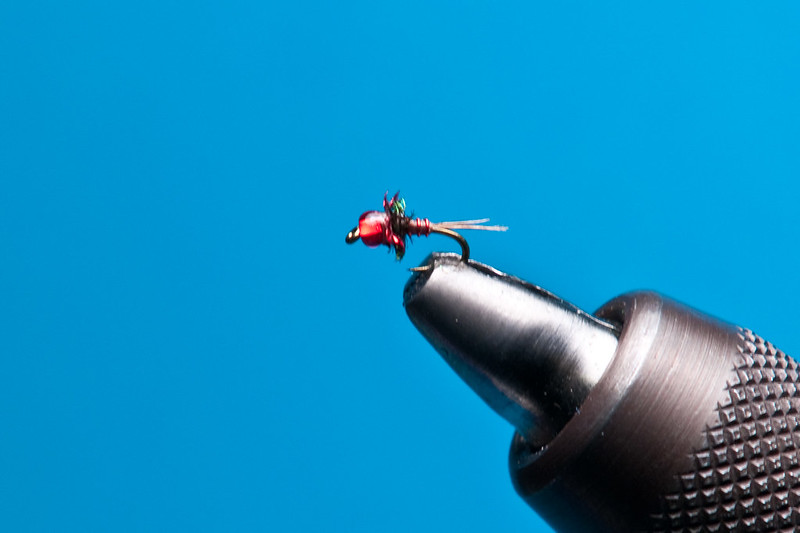
8.  Trim off the pearl tinsel and krystal flash legs.  And you're done!  (The legs should extend just about to the beginning of the hook bend)
Red Headed Step Child 10

This is a great little pattern and I've started to incorporate some things from it to other patterns.  I'm hoping to share a few of those tweaks in the near future!

Stay fly,

T


Thursday, March 7, 2013

2013 Thus Far

Eel River
So far the new year hasn't rung in too many good days on the water.  Utilizing the catalog of information in my brain on certain spots hasn't worked that well this year.  I'm choosing to blame it on the usual suspects (i.e. flows, weather, conditions, lack of skills, etc.).  Anyway, that leads me to my next point.  When conditions are tough, its a great time to scope out other areas and build upon that catalog of information.  Despite the fact I personally haven't had any truly great days on the water yet, I can say that I have fished a lot of different water.  This includes places where I have never been before or have only fished once prior.  That's also the beauty of the sport.  Having a great day but not catching a single fish is still very enjoyable if it's spent on great water with good friends.  Exploration and the search will always keep me thirsty.  Here are some photos from the beginning of the year.
Eel Fog in the Morning
Morning Run
Tight Loop
Striper

When things are slow, its also a great time to hit the vice.  Whether it be new patterns to try or just restocking, time at the vice can be enjoyable.   

Yuba Skwala
Stoneflies
River Sample
Duck Quill Wing Epeorus
Moving Violation Spey


Daniel and I have been working on some more tying videos as well.  In case you haven't seen the latest two, here they are:
The CCG Egg


The Dead Drift Crayfish


We're working on some killer bass stuff and should have a new one out there just in time for topwater season!  Stay tuned...


As always.....get out there and explore!

Stay fly, 

T

Wednesday, November 7, 2012

A Day with Capt. Dan Blanton


Almost two years ago I had won a guided trip on the CA Delta with Capt. Dan Blanton. For various reasons; whether it be weather or his busy guiding schedule, the trip hadn't happened until last month. This season, he decided to quit guiding and just enjoy the fishing. For some reason decided he still had an obligation to a few people to take em out and I was one of the lucky ones. For those of you that dont know who Dan Blanton is, just Google it. The man is like the godfather of striper fishing out here on the CA Delta. He runs a very popular forum here, and hosts/organizes StriperFest each year to raise thousands of $$ to protect the CA Delta striped bass.

For those of you that haven't been out on the CA Delta, or even those who have, it can be very overwhelming. I mean the place can get you lost, spun around, bass-ackwards, and not to mention get you run over by a Japanese barge rolling in to port at any time. Its crazy and definitely nice to learn a bit about the place from someone who has fished there for 40+ years.

To the day. I met Blanton at his skiff at the Sugar Barge around 7, and he was there already getting things ready. We headed out to the main channel of the San Joaquin and at his first spot we were going to hit up was already taken. Go figure as we roll up the guy is throwing top water spooks and bam catches a 17 lber! I was like this is going to be a good day. We move on to the next spot and the fog is really moving in. First few casts and pow a nice 4 lber. from there we landed a few more and the by that time the tide was slackining and fishing got tough. We headed from spot to spot til about 5, each landing around a half dozen keeper stripers and about the same LMB. Cant say the fishing was great but the time learning about the amazing fishery and techniques are invaluable things that will lead to great days in the future I'm sure. Thanks Dan and can't wait to get back out there. I've been hearing the bigger fish are moving in. Here are a few pics from the day..Stay Fly! D


Wednesday, October 31, 2012

End of the Season

Adipose
As I'm sitting here writing this, the date is October 31st, 2012. The Giants just won the World Series and I'm waiting to hand out candy to trick or treeters. Although this day is just Halloween for most, those that fly fish in the Central Valley of California know this day also as the last day of the season. The decimated population of local salmon that call these rivers home is the reason for this. In the fall these fish are called back to the river in which they were born to spawn and then die. This is a good closure and allows these salmon to not be disturbed, albeit tough for those who fish these rivers frequently. This two month break allows us to spend some time at the vise, restock the fly boxes, and check out other fishing opportunities. It is also a time to reflect and look back on the year. I, along with those I fished with, had a remarkable season on the Stanislaus, Tuolumne, and Merced rivers. The trout fishing was excellent and we were even met with a few river stripers. It was also a definite big fish year with many fish at or above the proverbial 20" mark. Still looking for Hog Johnson though! I know I'll find him one of these days on one of these rivers. Anyway, I'll let the photos tell the rest of the story from this year! Hopefully next year can match the one we had this year!
Dead Salmon
Rainbow Face
Bob fighting a fish
The Raft
Greg's nice bow
Striper Head
San Juan Fighter
Rainbow Head
Tim with a bent rod
Nice Streamer Grabber
Crawdaddy
Greg with a bow in the boat
The Release
On the swing
Epeorus

Monday, October 1, 2012

The GSF Fly Tying Series Vol. 2 - The Tickler

This one goes out to all the swingers! Well.....those that swing the FLY to be specific. With this edition of our Fly Tying Series we decided to go with a pattern for anadromous oncorhynchus mykiss. Yes, that means steelhead! I've become hooked on swinging for steelhead (and trout for that matter) this past year and wanted to highlight a pattern for the swing. After coming across Rich Zellman's Tickler, I knew I had found a pattern I wanted to do for this series. The Tickler is an intruder-style fly, but utilizes some different materials and techniques that I had never seen used in this capacity. It's a fun fly to tie, albeit complex, but definitely worth it! This fly has met many winter steelhead face-to-face and elicited a grab. The color scheme in the original pattern is a black/blue/pink combo, but can easily be changed to suit any tyer's desire. I tied a black/chartreuse combo that I think looks absolutely killer too. Anyway, hope everyone enjoys this video! Thanks for watching! Tie up a few ticklers and swing them this winter! I know I will.

Stay Fly,

T


Materials

Shank: Waddington Shank, size 35mm or Salmon/Steelhead hook (like Tiemco 7999 or Alec Jackson), size 2/0 cut and straightened

Hook: Owner SSW, size 2

Connection: Econoflex Craft & Beading Wire, 20lb, midnight black

Thread: Black

Butt: Ice Dub UV fluorescent hot pink dubbing ball

Rear collar: Black turkey flat

Tail: Black ostrich herl

Body: Fluorescent cerise Krystal Flash for the rear 3/4 and STS Trilobal Kingfisher blue dubbing ball for the front 1/4

Hackle: Black pheasant tail, stripped off of the stem and palmered

Shoulder: Fluorescent blue ostrich herl over fluorescent blue turkey flat

Collar: Fluorescent blue guinea

Wing: Pair of fluorescent blue grizzly saddle tips

Topping flash: Light blue Flashabou #6915

Eyes: Large lead eye dumbbells

Head Cement: Clear Cure Goo Thin

Saturday, September 8, 2012

The GSF Fly Tying Series Vol. 1 - The Wedding Veil

Recently, Daniel and I decided to embark on a new project involving filming new and proven patterns in an entertaining way. Most fly tying videos can be somewhat boring and strictly informative. We decided to try and break this mold by producing videos that stay informative but also are entertaining to watch. The fly we chose to kick off this series is the Wedding Veil, created by Thomas Harvey. This pattern is deadly in the water and is sure to bring in some nice bass. This fly also highlights some newer products, such as the Clear Cure Eyes. These eyes are weightless and constructed like traditional dumbbell lead eyes, but obviously without the weight of lead. Because of this design they are also far superior to regular stick on eyes due to the fact they won't fall off. One of the other key points to make about this fly is its customizability. The original pattern calls for a zonker strip for a tail but many different materials can be substituted for this. For example, in the video Daniel uses hackle feathers. Anyway, check it out!

 Stay fly,
T

Intro Video


The Wedding Veil

Monday, August 27, 2012

The Dead Drift Crayfish

Truckee River Crayfish
(Truckee River crayfish)

A few years back during a random time-wasting YouTube session, I stumbled on Andy Burk's page.  After checking out a few tying videos I came across one about a dead drift crayfish pattern tied by Tim Haddon.  At the time, I had never tried fishing a crayfish pattern dead drifted so I thought I'd give it a whirl and tied up a few.  Last September on the Truckee this pattern proved itself to be a good one for me.  After using it on other rivers, such as the East Walker, it has found a home in my box.  I typically fish this pattern as the top fly on an indicator set up with a smaller bug such as a baetis trailing.  It serves as a great attractor and even if the fish aren't enticed to take the cray it'll get their attention.  Anyway, I'm headed back to the Truckee next week and tied up a small arsenal of these and thought I'd do a tying segment on it.  Here it goes!

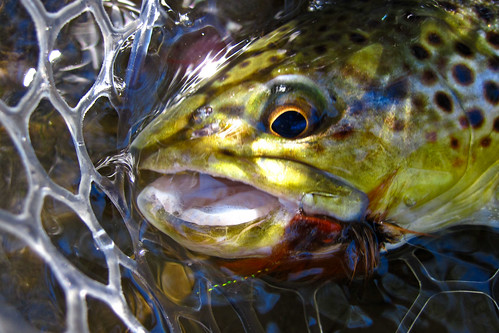
(A barely hooked EW brown that fell for a dead drifted crayfish)
Crayfish eating EW Brown

Materials
Hook:  Tiemco 5263 #8
Thread:  Danville black 6/0
Eyes:  Small bead-chain
Weight:  Lead wire .025
Antennae:  Crawfish orange rabbit fur and turkey tail
Flash:  Root beer krystal flash
Claws:  Black-barred crawfish orange rabbit strips
Shell-back:  Mottled thin skin
Rib:  Black wire, size medium
Body:  Blend of burnt orange and olive dubbing
Hackle:  Saddle hackle, ginger color

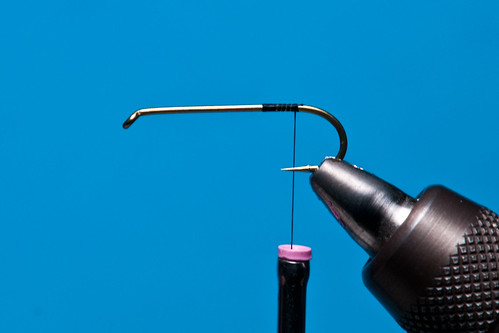
1.  Wrap the thread back to the point where the barb starts to flare up.
DDC 1

2.  Tie in the bead chain eyes on the top of the hook by cross wrapping them.  Make sure to lay down enough thread wraps to firms lock those eyes into place.
DDC 2

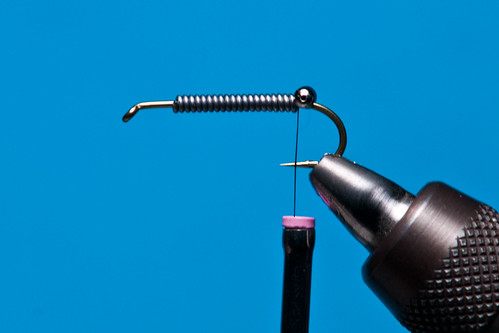
3.  Wrap in about 20 or so turns of lead wire and push it back as close to the eyes as possible.
DDC 3

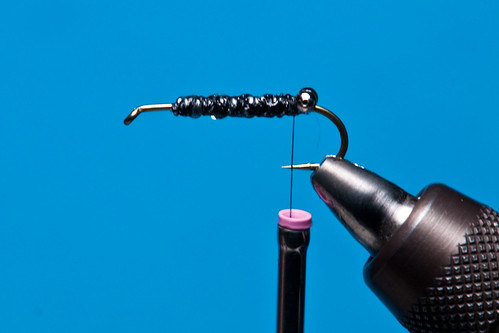
4.  Coat the thread wraps with some glue (such as Fleximent or Loon Hard Head) and wrap thread over the lead to secure it in place.
DDC 3

5.  Tie in a clump of rabbit fur out the back of the hook.
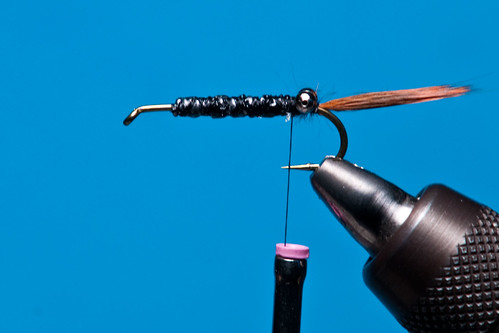
DDC 4

6.  Next, cut 3 or 4 fibers from a turkey tail off and tie them on one side of the hook shank.  Repeat this for the other side as well.
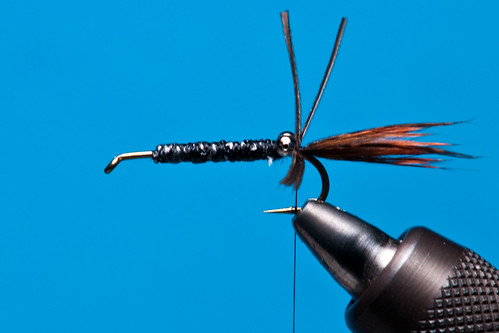
DDC 5

7.  Then tie in 4 or 5 strands of krystal flash.
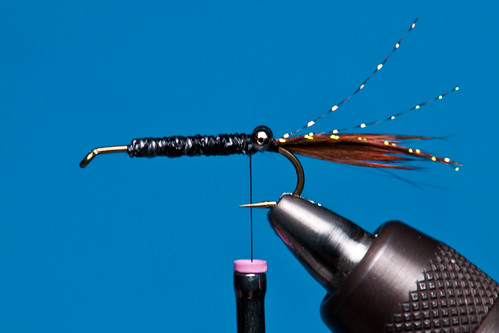
DDC 6

8.  Cut out a piece of think skin that is just a little bit wider than the eyes and just a little bit longer than the hook shank.  Taper this piece down and trim it so that it looks like the shape of a coffin.
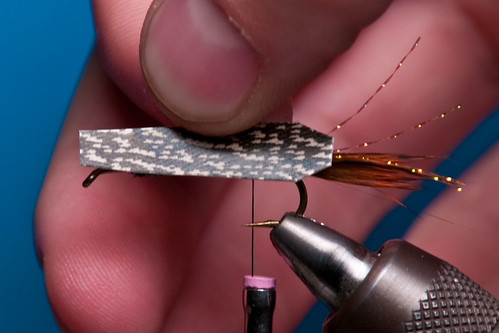
DDC 7

9.  Tie in the wider end of the piece of thin skin behind the eyes.
DDC 8

10.  Hand blend up a bit of burnt orange and a bit of olive dubbing.  This is a good color scheme for the Truckee River crayfish.  (See the above picture)
DDC 9

11.  Dub the head of the crayfish by cross wrapping it through the eyes.
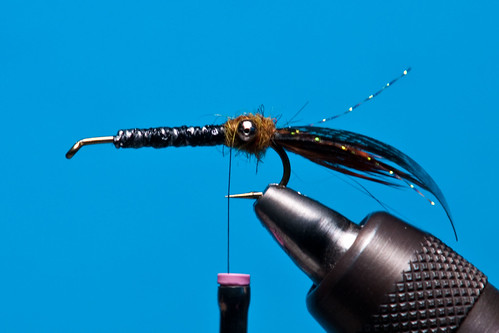
DDC 10

12.  Cut 2 rabbit strips that are about an inch long.  I like to cut points on the ends of the strips going out the back, but that is just purely aesthetic.  Then tie in a strip on each side of the hook shank.  Make sure to tie them as close to the eyes as possible.  This helps flare the claws out as it drifts in the water.
(Top view)
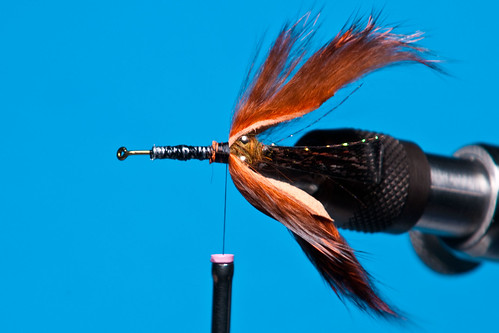
DDC 11
(Side view)
DDC 12

13.  Wrap the thin skin over the head of the fly and secure it with a few turns of thread.  Then pull it back out of the way.
DDC 13

14.  Tie in about 4 inches of wire for the rib on the side of the hook shank.
DDC 14

15.  Prepare a ginger hackle feather and tie it in at the base of the stem.
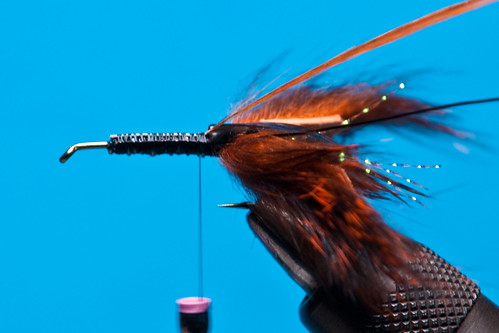
DDC 15

16.  Dub a body of the same orange/olive blend.  Gradually taper down the body as you move forward.
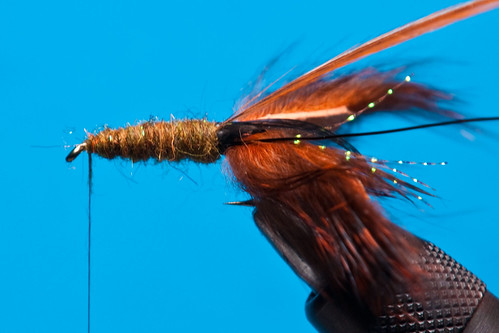
DDC 16

17.  Palmer the hackle forward and tie off.
DDC 17

18.  Cut the top fibers of the hackle off so the thin skin has a flat place to lay down.
DDC 18

19.  Pull the thin skin over and tie off.
DDC 19

20.  Counter wrap the wire to secure the thin skin and the hackle
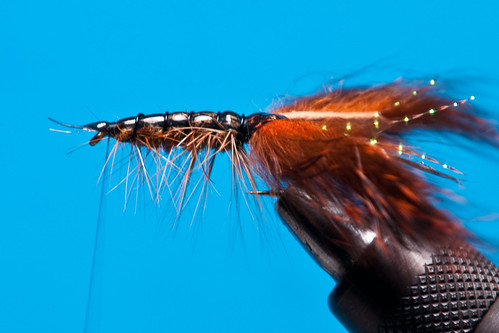
DDC 20

21.  Whip finish and done!
(Top view)
DDC 22
(Side view)
DDC 21

This fly isn't a 1-minute tie but if you tie it right, it is very durable and should last through many fish.  Play with the color combos too.  The original pattern uses more olive colors than the one I tie, but customization is one of the beauties of fly tying.   Tie up a few and add them to your box!

Stay fly,
T